Case at a glance
Photo timing

These details are excerpts from the original article and captions. Follow a detail to read it in context.

[Nose Lab Clinic]


Hello, this is Dr. Cha-Young Kang, Chief Surgeon at Nose Lab Clinic.


Today, I’m sharing a case of emergency revision rhinoplasty due to the imminent exposure of a silicone implant.
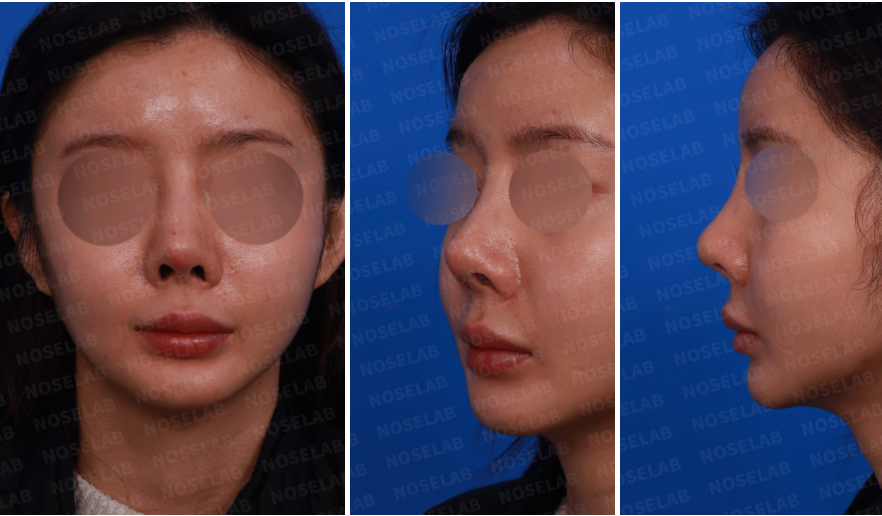
Preoperative photos for emergency revision rhinoplasty: frontal, left profile, and oblique views showing silicone exposure risk and nasal asymmetry.
Design Consultation: Frontal View, Left Side View, and Oblique Side View Photos
Original image ↗

Case Background and Patient History

  • 3 years ago: Dissolving filler injection

  • 2 years ago: Septoplasty with silicone implant insertion

  • 8 months post-op: Signs of inflammation treated with medication
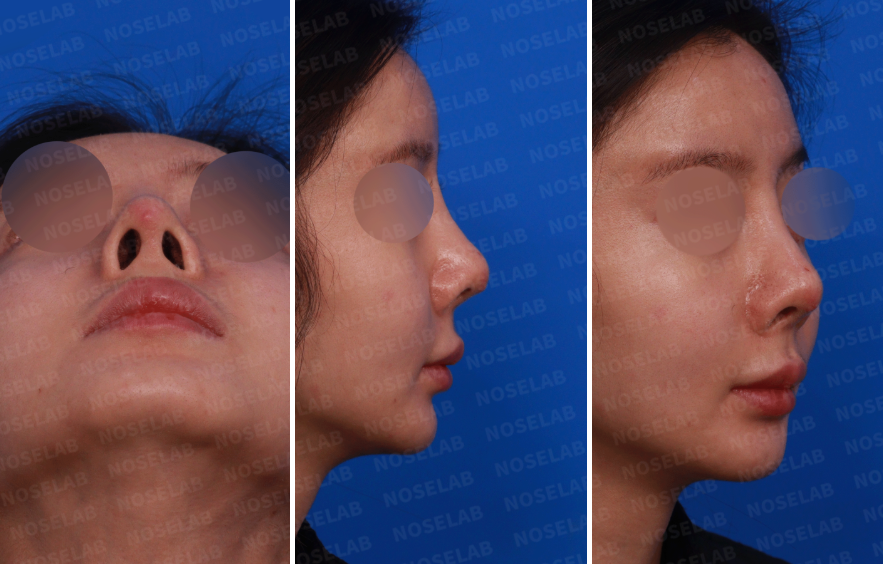
Preoperative design photos for emergency revision rhinoplasty: nostril view, right side profile, and oblique angle showing tip asymmetry and silicone exposure.
Design Consultation: Nostril View, Right Side View, and Oblique Side View Photos
Original image ↗

Diagnosis Before the Emergency Revision Rhinoplasty

a. Skin Condition

  • Redness at the nasal tip

  • Silicone implant nearly breaking through the skin

  • Skin thinning at the tip


b. External Appearance

  • Nostril exposure from the front

  • High radix

  • Upturned nasal tip

  • Asymmetrical nostrils


c. Endoscopic Findings

  • Septal deviation to the left

  • Enlarged inferior turbinates on both sides

  • Adhesion of left nasal mucosa

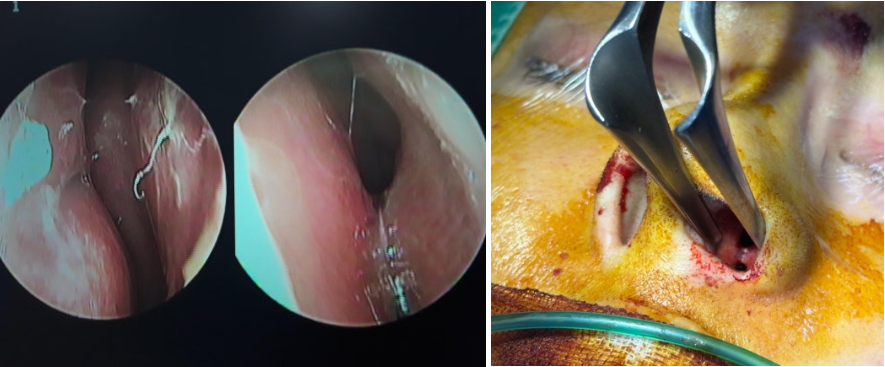
Endoscopic and intraoperative images for emergency revision rhinoplasty: mucosal adhesion observed in the left nasal cavity and inflamed tissue during implant removal.
Nasal Endoscopy Photo (Left) / Intraoperative Observation of Mucosal Adhesion in the Left Nasal Cavity (Right)
Original image ↗

Surgical Plan and Emergency Reconstruction Procedure

a. Emergency Measures

  • Immediate removal of the silicone implant

  • Thorough debridement of inflamed and damaged tissue

Intraoperative view during emergency revision rhinoplasty showing silicone implant nearly protruding through the nasal tip skin.
This photo shows the silicone implant extending just beneath the nasal tip skin, indicating that it was on the verge of protruding through.
Original image ↗

b. Autologous Reconstruction

  • Nasal tip rebuilt using autologous cartilage

  • Dermal graft placed to reinforce thinning skin

  • Preventive antibiotic treatment initiated


c. Aesthetic Corrections

  • Corrected the upturned tip

  • Aligned the nostrils for symmetry

  • Smoothed the nasal bridge

  • Adjusted nasolabial angle for balance


Postoperative Outcome of Emergency Revision Rhinoplasty
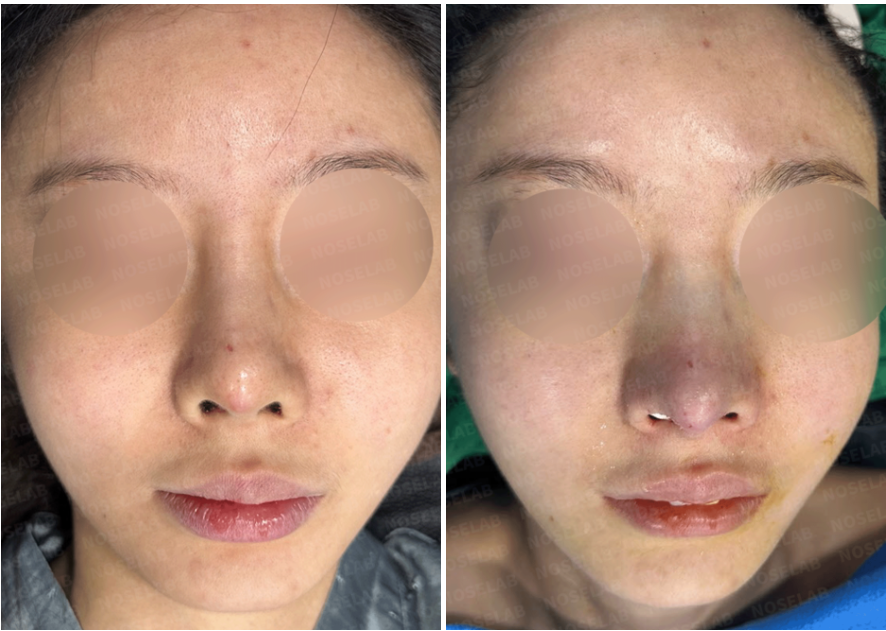
Before and immediately after emergency revision rhinoplasty: frontal view showing correction of nasal tip exposure and nostril asymmetry.
Before (Left) / Immediately After (Right)
Original image ↗

a. Frontal View

  • Reduced nostril visibility

  • Natural bridge height and stable tip position

  • Symmetry restored

Side view before and immediately after emergency revision rhinoplasty: correction of upturned nasal tip, softened radix, and improved nasal profile line.
Before (Left) / Immediately After (Right)
Original image ↗

b. Side View

  • Softened radix for a smoother profile

  • Defined and lifted nasal tip

  • Harmonious overall side profile

Oblique angle before and immediately after emergency revision rhinoplasty: improved nasal tip definition, correction of implant exposure risk, and refined nasal contour.
Before (Left) / Immediately After (Right)
Original image ↗

c. Skin Recovery

  • Redness resolved

  • Improved skin quality with dermal graft

  • Healthy skin regeneration achieved

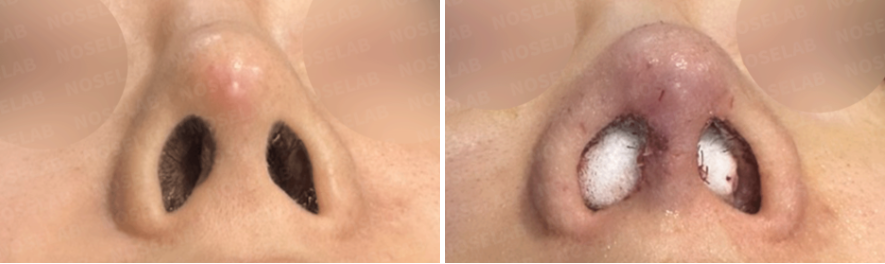
Basal view before and immediately after emergency revision rhinoplasty: correction of nostril asymmetry, improved columella support, and resolved implant exposure risk.
Before (Left) / Immediately After (Right)
Original image ↗

Expert Commentary on Emergency Revision Rhinoplasty

This emergency revision rhinoplasty was necessary to prevent implant exposure, which could have caused severe damage. The rapid intervention — combining implant removal, cartilage reconstruction, and dermal grafting — resulted in both functional and aesthetic recovery.

The key issue, thinning skin from prior surgery, was successfully resolved through autologous tissue techniques.It’s critical to monitor and act quickly when implants begin to show signs of complications.
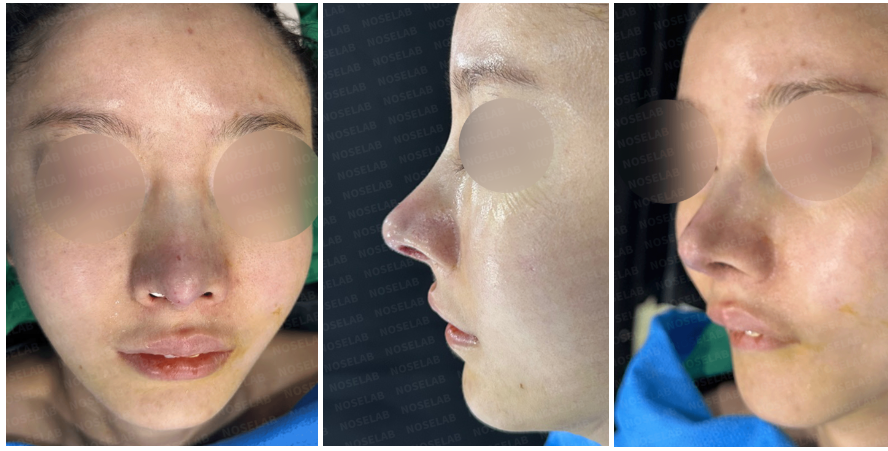
Immediately after emergency revision rhinoplasty: frontal, lateral, and oblique views showing restored nasal symmetry, refined tip contour, and stabilized nasal profile.
Immediately After Surgery: Frontal, Side, and Oblique Side View Photos
Original image ↗
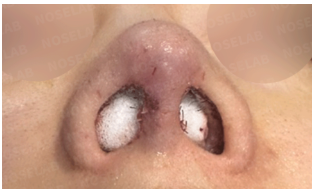
Immediately after emergency revision rhinoplasty: basal nostril view showing columella reconstruction, internal packing, and improved nostril symmetry.
Immediately After Surgery: Nostril View Photos
Original image ↗


At Nose Lab, all rhinoplasty surgeries are performed using the closed (endonasal) approach.
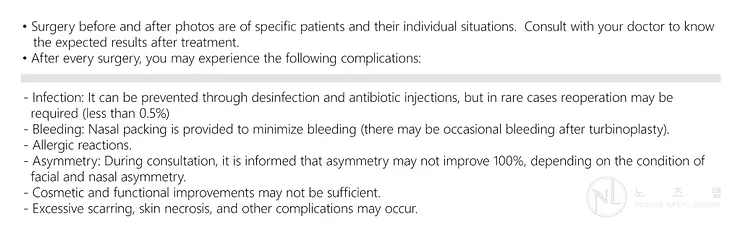
Postoperative precautions and possible complications after rhinoplasty – includes information on infection, bleeding, asymmetry, allergic reactions, and scarring.
Case photograph 11
Original image ↗

MMessenger(WhatsApp) : +82 1057360302


Read the author’s background and the original case context. About these articles

Source updated .